
simple tips and suggestions you will be amazed by. i mean so simple, why didn’t we already know these? share with your friends and amaze them with your knowledge! 🙂
simple tips and suggestions you will be amazed by. i mean so simple, why didn’t we already know these? share with your friends and amaze them with your knowledge! 🙂

you HAVE to watch this video… this looks so yummy, i wish i had one right now! scrumptious!

Cinnabon Cinnamon Rolls Copycat Recipe
makes 12 cinnamon rolls (from the roasted italian)
Rolls
2 ¼ teaspoons active dry yeast
1 cup water warm (110-120°F)
½ cup granulated sugar
¼ cup buttermilk
2 large eggs
7 tablespoons unsalted butter, divided
5 ½-6 cups all-purpose flour
2 teaspoons kosher salt
Filling
½ cup unsalted butter, softened
1 ½ cups light brown sugar, packed
2 tablespoons ground cinnamon
1 teaspoon cornstarch
Frosting
4 ounces cream cheese, softened
¼ cup unsalted butter, softened
1 cups powdered sugar
½ tablespoon fresh lemon juice
1 teaspoon vanilla extract
½ teaspoon kosher salt
Pour water and sugar into the bowl of a stand mixer fitted with a dough hook
(see cooks note if you do not have a stand mixer), sprinkle yeast over top and stir.
Allow yeast to bloom for 5-10 minutes.
Once it is nice and foamy, it is ready. *It should look like the ‘head’ of a beer poured too quickly and smell yeasty.
In the meantime: melt 6 tablespoons of butter in a microwave safe bowl.
Once yeast mixture is aromatic and looks like the head of a beer, add buttermilk, eggs and butter to bowl of stand mixer.
Mix on low and add 4 cups of flour, one cup at a time. Add salt. Once flour is mixed in, add remaining flour slowly until
dough becomes a ball. Mine takes 5 ½ cups total. Knead dough on medium-high for 5 minutes. Add more flour a
tablespoon at a time as needed, if bread is too sticky to come together. Dough should be tacky when you pull it out of
the mixer, not sticky. Lightly dust countertop with flour. Turn dough out onto countertop. Knead a few
turns, shape dough into a ball.
Add 1 tablespoon butter to bowl and heat in microwave until melted. Place dough into bowl upside down, flip dough over
and cover loosely with plastic wrap and drape bowl with a towel. Set bowl in a warm place in your kitchen. Allow dough
to rise for 60-90 minutes until nearly doubled in size.Meanwhile combine light brown sugar, cinnamon and corn starch in a medium bowl. Stir with as fork until well combined. Set aside.
Turn dough out onto a lightly floured surface. Knead the dough a few turns, then using a rolling pin, roll out into an 18”
tall x 24” wide rectangle. Spread softened butter around dough leaving the bottom 1” border uncoated.
Sprinkle buttered dough with brown sugar mixture, leaving the bottom 1” uncoated. Use your rolling pin to gently
press sugar mixture into the dough (so it doesn’t fall out as you roll it).
Starting at the top, tightly roll dough toward you, using the last 1” to seal roll. Cut dough roll in half and then cut those
halves in half, giving you 4 pieces. Cut each of those pieces into 1/3rd. You will have 12 pieces.
Grease (2) 9”x13” baking dishes. Place rolls in pans evenly spaced out, 2 rows of 3 rolls in each. Make sure to put the end
pieces upside down. Loosely cover with plastic wrap and drape a towel over pans.Set pans in a warm place and allow rolls to rise another 60-90 minutes until rolls have doubled in size.
Preheat oven 350°F.
Bake for approximately 20 minutes until golden brown and cooked through.
Halfway through baking time rotate the pans.In the meantime prepare frosting; add
cream cheese and butter in a large mixing bowl. Beat with an electric mixer (or stand mixer)
until light and fluffy. Add remaining ingredients. Beat until mixture is light and fluffy, about 3-5 minutes. Set aside.
Remove rolls from oven. Spread ¼ of frosting over each pan of rolls. Allow to cool slightly and repeat. Serve and enjoy!
COOKS NOTE: You can mix the dough by hand if you do not have a stand mixer. Add water, yeast and sugar to a large
bowl. Once the yeast blooms stir in the salt and the flour. Mix with a spoon. Turn dough out onto floured counter top and
knead for 3-5 minutes until dough is no longer sticky. Proceed with remaining instructions.
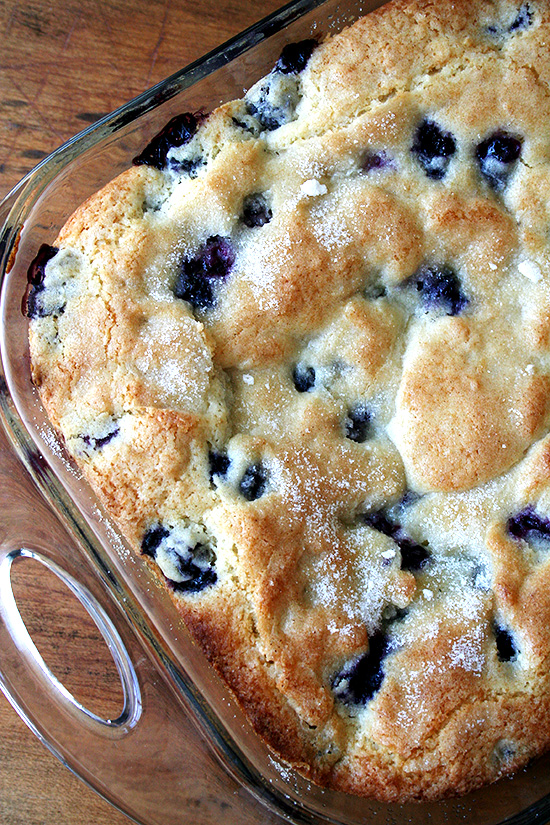 click for recipe and wonderful photos
http://www.alexandracooks.com/2011/06/29/buttermilk-blueberry-breakfast-cake/

cake
1/4 cup milk, at room temperature
4 eggs
2 teaspoons vanilla extract
2 1/4 cups cake flour, sifted
1 3/4 cup granulated sugar
4 teaspoons baking powder
1 teaspoons salt
3/4 cup unsalted butter, at room temperature
3/4 cup strawberries, pureed
frosting
2 cup butter, at room temperature
1/2 Tablespoon vanilla extract
8 cups confectioners sugar
6 tablespoons strawberry syrup
1-3 Tablespoons of milk
Filling/topping
1 cup strawberry jam
8-12 strawberries, halved
<p>Original <a href=”http://grandmotherskitchen.org/recipes/strawberry-double-layer-cake.html”>Strawberry Double Layer Cake Recipe</a> found at Grandmothers Kitchen <a href=”http://grandmotherskitchen.org”>Recipes</a>.</p>

What could be better than homemade sugar cookies? Homemade sugar cookies WITH vanilla bean frosting! yummy!!! check it out at the link:
http://cookiemonstercooking.com/2012/08/24/vanilla-bean-sugar-cookies-with-royal-icing/
When I first started prepping, one of the first things I started to store were buckets of wheat given that they are relatively cheap and have a shelf life of 30+ years.
Overall it’s a fantastic storage food – especially if you like baking bread like I do.
The only problem that I found though was with yeast.
Although you can store your wheat for 30+ years, yeast’s shelf life will only last about a year before it starts to die off and become ineffective. And unless you enjoy eating unleavened Matzah bread, you’ll be forced to eat a lot of bread bricks during a SHTF situation.
This realization led me on a journey to find out how to make homemade yeast. For years I had looked around but could never figure it out until I stumbled upon an awesome blog called originalyeast.blogspot.com. In it, the author (I believe her name is Wao) learned how to make natural yeast while over in Japan.
These last couple of weeks I’ve been playing around with making natural yeast and have had some great success which I hope to share with you.
http://www.tacticalintelligence.net/blog/how-to-make-homemade-yeast.htm


You must be logged in to post a comment.