 So, we have told you all about our love affair with Kombucha (or Leslie’s love affair with the booch). And although I am in ‘like’ with the stuff, I am totally struggling with the idea of buying the whole CBS (continuous brew system). There are just two of us in the house, and it’s really just me who drinks it regularly. So that large batch would go to waste in our house. But I am disgusted to be
 wasting spending $4 a day on this habit! So, I decided to grow my own scoby, brew the tea, and flavor it. At first I didn’t think my scoby was growing, but it finally did and now I am going to show you how to do it.
Now, if for some reason my hubs starts to drink it more frequently, we will have to make the leap and purchase the Continuous Brewer System because this small batch method is definitely just enough for me. I am guessing that once I use flavors such as mango he will start to drink it too. But I have to toy around with some flavors that he likes.
This is all you need to get started making kombucha:
- 1 or 2 half gallon glass container (one to start but in a few days you should brew another so you can have a consistent flow)
- Smaller glass container (quart mason jar?)
- GT’s Original Raw Kombucha (no flavored stuff!) — OPTIONAL: it is recommended to purchase a scoby from someone you trust. Because we have a great relationship with Hannah at Kombucha Kamp and she is extremely responsive to our many questions, we highly recommend starting with her scoby. If you are concerned about the store version and some random company who does ‘who knows what’ with the scoby colony, you can purchase Hannah’s culture HERE.
- Cane sugar (any kind even refined is ok — really, no joke!)
- filtered water (no chlorinated stuff or it will kill your scoby)
- saved bottles from purchased kombucha for re-bottling
GROW
The first thing you need to do is GROW a scoby. All raw store-bought kombucha have scobies floating around in them, even if they are teeny, tiny. We are going to use that tiny culture to grow a large scoby. Here’s how:
1) Open the GT’s raw original kombucha and pour it into a quart sized mason jar.
2) Add 3/4 cup sugar
3) Cover with a paper towel (or a tea towel or cheesecloth) and use the screw top (not the lid) to hold the paper towel in place.
4) Keep in a warm, dark place for 9-12 days (or longer if it is cooler). Scobies grow best at around 77 degrees. Too hot will kill it and too cool with slow it’s growth. Try to keep it at an even temperature of between 75 – 77 degrees. A little above or below won’t hurt but this is optimal.
5) At about day seven, you should start to see a larger scoby forming. Start checking to see if it smells like vinegar. Once it starts to smell slightly sour, use a straw to pull liquid (don’t suck it, but place the straw in and put your finger at the top to hold it.) Then pull it out and test the liquid. If it tastes like kombucha you are done. But if it is still sweet, keep growing. If it is vinegary but you think the scoby needs to be bigger, add more sugar and continue the process until it is finally sour. The scoby only needs to be about 2 1/2 – 3 inches in diameter. It will continue to grow when you brew.
BREW THE BOOCH
For this part you need:
- Half gallon jar (depending on how much you are making, I use two and alternate to brew the booch so there is no down time without Kombucha)
- 3-4 tea bags (I use organic black chai and green tea)
- 1/2 c sugar
- filtered water
- your newly grown scoby and 1 cup of its starter liquid
DO NOT USE METAL TO TOUCH THE SCOBY OR BOOCH LIQUID. I use wooden spoons and bamboo tongs.
Steps:
1. Boil 3 cups of filtered water.
2. Add 3-4 teabags and steep for 5 minutes. Squeeze the water out of the bags and remove bags.

3. Add 1/2 cup sugar and dissolve.
4. Add 4 c ice water to the pot to cool the brewed mixture
5. Add the sugar tea to a half gallon glass container (I have a large half gallon mason jar).
6. Check that the brew is not too hot. It should be room temperature or close.
7. When room temperature, add 1 cup of the starter liquid from what you grew your scoby in and . . .

Starter liquid, scoby and half gallon
8. Add the scoby.
9. Cover with paper towel, screw on the ring over the paper towel to secure or use a rubber band.

10. Wait for about a week to 9 days. Once it smells vinegary start tasting to see if it is the proper taste using the straw method in the growing part.

I use a calendar to keep track of when I started the batches. This reminds me to check it since I don’t leave the cultures on the countertop but in the cabinet.
11. Once finished brewing, remove scoby and set aside with 1 cup liquid for restarting a new batch.

Notice that I have two? A baby scoby grew in the brew!
12. Bottle the rest of the scoby mixture leaving enough room to add flavoring (1-2 inches) and get ready for the flavoring. This will make 3 and 1/2 – 16 oz bottles.

*If for some reason you are not going to brew again right away, check out this video for what to do to store your SCOBY
FLAVOR THE BOOCH
This is the fun part. I am a little bit of a rule follower and felt that I needed instructions to get me started. But really, all you need is a little imagination. Anything that has natural sweetness can be added to flavor your kombucha.
Flavors to try or mix are endless, and you really don’t need a lot of sweetness in the second ferment. Here are some suggestions for flavors if you are stuck:
- vanilla
- citrus (and peels with the pith removed)
- apples (pureed)
- bananas (pureed)
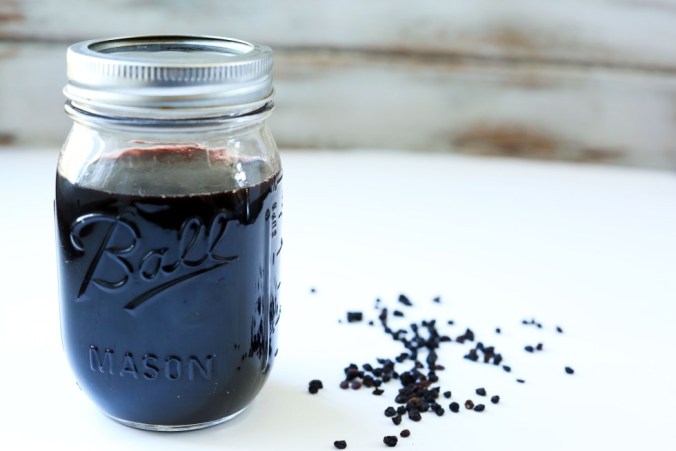
- berries (juice or whole berries)
- ginger (grated or juiced)
- grapes (juice)
- mangoes (pureed first)
- greens (crushed to release the sweetness)
- mint (in combination with other sweeteners)
- chocolate . . . . . . . . . . oh the possibilities, just make sure there is sugar content in the chocolate
- cinnamon or other spices (in combo with sweeteners)
- any kind of fruit juice, I know this flies in the face of real food with HFCS and fructose, but this becomes a non-issue sine the kombucha converts it to a healthy acid for your body to use.
- or any other combination that you are willing to try. These are just a few suggestions.
To make:
1. Take a 16 oz bottle and fill it but leave 1 1/2 inches at the top for room for the sweetener (same step 12 from brew above).

2. Place any combination of sweeteners above but leave at least a 1/2 inch at the top for it to expand a bit. (For my fist batch I used a cap-ful of raspberry juice and a tiny piece of a vanilla pod, which I will probably reuse)

cap-ful of raspberry juice and a tiny piece of vanilla pod sliced to expose the seeds
3. Cover tightly with a lid. No mesh top this time. It needs to be sealed tight.

Flavored Brew for second ferment. This will start to fizz after three days.
4. Leave in a dark, warm place for about three days.

My Culture Cabinet – there is a batch of sourdough starter hiding in the back too!
5. Refrigerate.
6. ENJOY the fact that you just made your very own booch from growing to brewing to flavoring. AND you did it for less than $.50 a bottle. Yeah, that is probably the best part. Buh-Bye $4 bottle of booch. Hello homemade, self sustaining booch. It actually gets cheaper with time because you never have to re-buy the scoby (unless you kill it of course).
http://realfoodfreaks.com/2012/05/30/grow-brew-and-flavor-kombucha-for-almost-nothing/#


You must be logged in to post a comment.